To build a first gaming PC you buy the parts yourself, fit them together in a fixed order, connect the cables, then install Windows from a USB drive. This guide walks through how to build a first gaming pc from an empty floor to a machine running games, with the compatibility checks and troubleshooting that beginners usually discover the hard way.
Plan on an afternoon for the assembly, somewhere between three and five hours if you have never done it. The assembly itself is mechanical and forgiving. Choosing parts that actually fit together is the part that costs people real money, so most of the care goes into the first hour, before any box is opened.
Table of Contents
- 1What You Need
- 2Essential tools and workspace
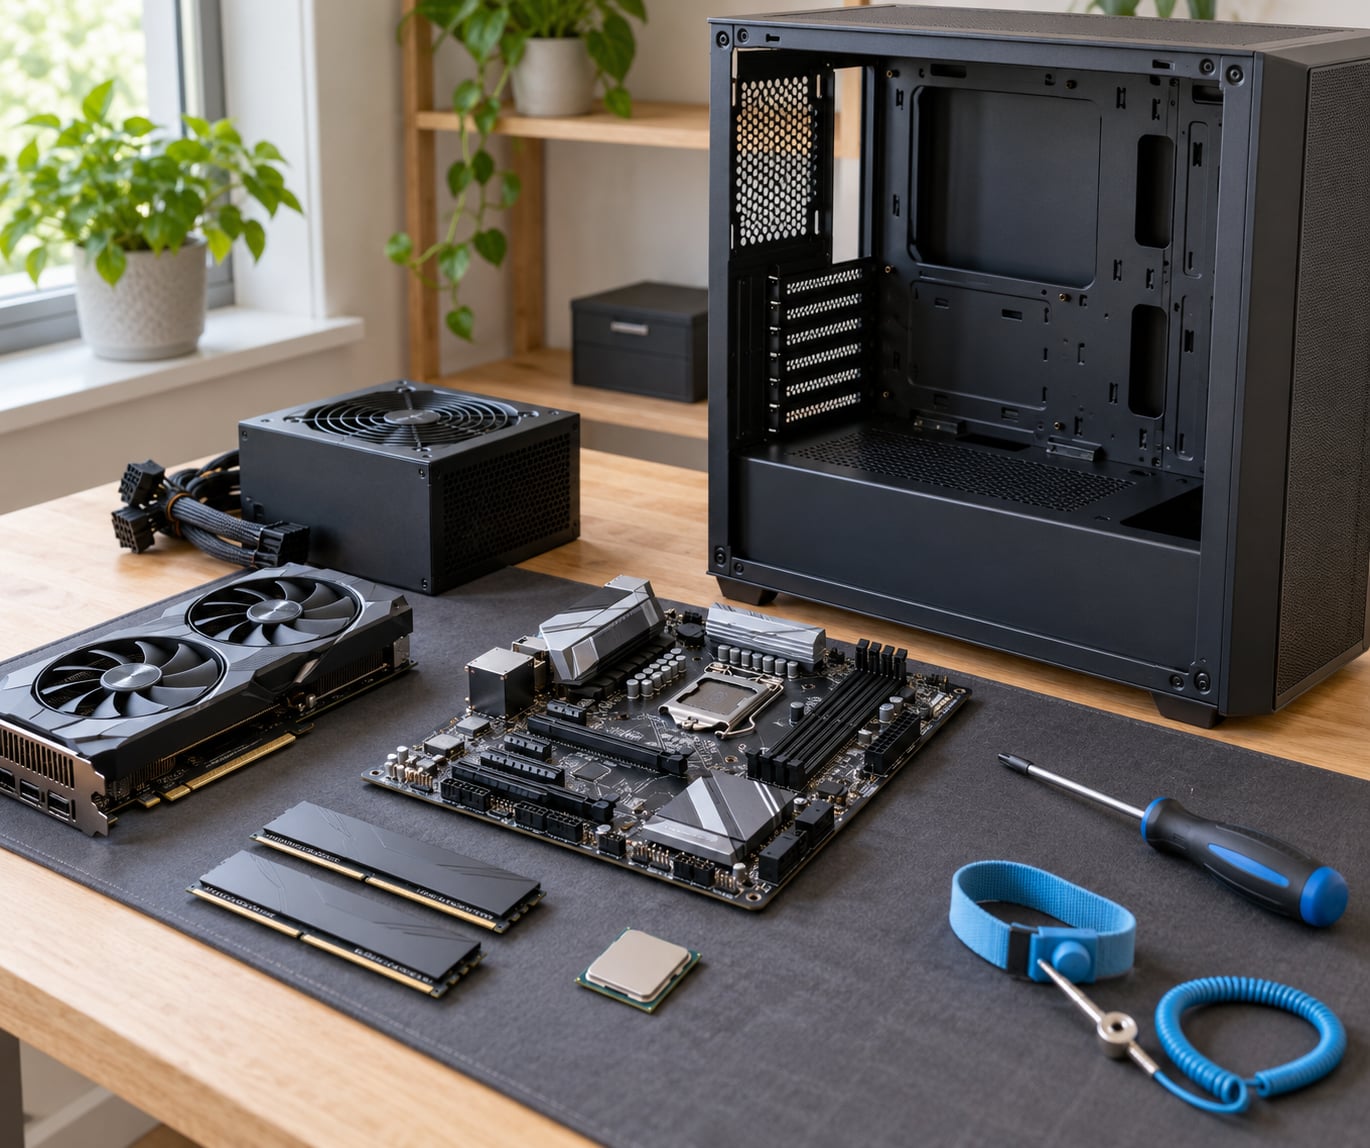
- 3Core components checklist
- 4Compatibility rules that catch nearly everyone
- 5Pre-build checklist
- 6How long the whole thing takes
- 7How to Build a First Gaming PC Step by Step
- 8How to build a first gaming PC: set your budget and parts list
- 9Prepare the case and install the power supply
- 10Install the processor and thermal paste
- 11Install the memory, M.2 storage, and motherboard
- 12Install the graphics card and case fans
- 13Connect power, cables, and display output
- 14Turn it on, install Windows, and test the PC
- 15Common Mistakes
- 16Frequently Asked Questions
- 17How long does a first gaming PC build take?
- 18My new PC build will not post, what should I check first?
- 19Should I build a gaming PC or buy a prebuilt?
- 20Do I need liquid cooling for a first gaming PC build?
- 21How do I know which RAM slots to use?
- 22What should I do first after finishing a new gaming PC?
- 23Conclusion
What You Need
You need a short tool list, a clear work surface, and every part of the system on one surface before you touch anything. Gathering the tools first is what turns a two-hour build into a five-hour one.
Essential tools and workspace
- Phillips #2 screwdriver — case screws, motherboard screws, PSU, graphics card bracket, standoffs.
- Phillips #0 screwdriver — M.2 SSD screws and a few small case fittings.
- 8GB or larger USB flash drive — you will format it to install Windows, so nothing on it matters.
- A flat parts tray or an unopened box lid — screws and standoffs go in one place, never on the floor.
- Zip ties or Velcro straps — for cable management once the build is together.
- An antistatic wrist strap — optional but cheap, and it removes the static question entirely.
- A bright light or desk lamp — a flashlight in your mouth works too, but it is miserable.
Build on a hard floor, not carpet. Carpet and socks are a bad combination around exposed electronics, and the floor is also where you can actually fit a tower case upright while you work on it.
Ground yourself before each part. Touch a bare metal section of the case, keep one hand on bare metal while you work, or clip the wrist strap to the chassis. Static discharge does not fry parts dramatically — it usually just kills a RAM stick or a drive weeks later, which is a miserable way to learn.
Core components checklist
Seven components make a working PC. An eighth, the CPU cooler, decides how loud the thing is.
- CPU (processor) — the brain. Runs the game logic and everything else. Gaming performance depends far more on the graphics card than on the CPU, so mid-range is nearly always the right call.
- GPU (graphics card) — draws the picture. Usually the most expensive and most impactful part in a gaming build, and the one worth spending on.
- Motherboard — the board everything plugs into. Its socket decides which CPU fits, and its form factor decides which cases accept it.
- RAM (memory) — short-term working memory. Buy one matched dual-stick kit rather than two separate sticks bought at different times.
- Storage — an M.2 NVMe SSD is the sensible default. It slots straight into the motherboard and needs no cable routing.
- Power supply unit (PSU) — converts wall power into the specific rails the PC needs. Buy it on wattage and 80 Plus rating, not on looks.
- Case — the chassis, with the motherboard tray, drive cages and fan mounts inside it.
- CPU cooler — a tower air cooler handles any modern gaming CPU without fuss. Liquid cooling is a look and noise preference, not a requirement.
A graphics card and a CPU are sold separately, and there is no bundle that always makes sense. A complete starter kit sold as one package can be convenient for a first-timer, because compatibility is already settled.
Compatibility rules that catch nearly everyone
Socket. The CPU socket lives on the motherboard — AM5 for current AMD chips, LGA for current Intel ones. A CPU physically either fits or it does not, and the pins or pads are not forgiving.
Memory generation. DDR4 and DDR5 modules look similar and are not interchangeable. Check which type your motherboard takes; current boards are DDR5, and mixing generations does not work at any speed.
Form factor. ATX is the full-size standard, microATX is smaller and usually cheaper, Mini-ITX is the compact one. A microATX board fits in an ATX case, not the other way round. The case you like may also come with a board included, which removes the decision.
Clearance. Check the case’s maximum graphics card length and maximum CPU cooler height against the parts you picked. This is the single most common hardware mismatch, and a card that does not fit means a different case or a different card.
Wattage. Add up the recommended wattage of the CPU and graphics card, then leave roughly a third on top for transient spikes and future parts. Efficiency matters more than raw size: a well-rated supply at a comfortable capacity runs cooler and quieter.
Free tools check the arithmetic for you before money moves. A compatibility checker will flag socket, memory and clearance problems in seconds, and a parts-list browser shows where the budget actually goes across three price tiers.
Pre-build checklist
Before opening anything, open every box and confirm all seven components plus the cooler are present, including screws and manuals inside the case bag. Save the motherboard manual — its diagram is the single best reference for front-panel headers and power sockets, and you will need it twice.
Check that your CPU is supported by the motherboard’s BIOS out of the box. Current boards ship with recent BIOS versions, but a CPU bought earlier may need a BIOS update before the board will boot with it, and that update has to happen before anything else works.
Keep every box. Assembly damage is uncommon and packing material for a return is not.
How long the whole thing takes
| Task | First-time estimate |
|---|---|
| Parts research and compatibility checks | 1-3 hours |
| Workspace setup, unboxing, sorting | 20-40 minutes |
| CPU, cooler and thermal paste | 25-45 minutes |
| Motherboard, standoffs, I/O shield, RAM, M.2 | 30-50 minutes |
| Power supply and cabling | 25-40 minutes |
| Graphics card, fans, tidying | 20-30 minutes |
| First boot and POST troubleshooting if needed | 0-45 minutes |
| Windows install, drivers, BIOS settings | 45-90 minutes |
How to Build a First Gaming PC Step by Step
The order below is not arbitrary. It moves the fiddly work forward, while there is room to reach into the case, and it puts the parts that depend on each other next to each other in time.
How to build a first gaming PC: set your budget and parts list
Decide two things before you pick a single part: which resolution you play at, and how many frames per second you want there. A 27-inch 1080p monitor at 144Hz and a 4K monitor at 60Hz are completely different builds, and the difference is usually worth more money than any component upgrade.
Then set a firm total and split it by priority rather than by equal shares.
| Tier | Where the money goes | What you get |
|---|---|---|
| Tight budget | Graphics card and power supply first, everything else mid or low | 1080p at medium to high settings in most competitive titles; playable in the heavy ones |
| Mid-range | Strong GPU, 16GB of memory, decent case and cooling | 1080p high or 1440p high on a high-refresh monitor, current games comfortably |
| Higher budget | Higher-end GPU, larger SSD, better airflow and cooling | 1440p high refresh, or 4K, plus room to stream and edit on the side |
The rough rule that has held up for years: a mid-range CPU with a strong GPU beats a flagship CPU with a weak one, in every game that matters. Community advice on r/buildapc is blunt about the opposite habit too — spending on parts you will never use is spending you do not get back.
If you already own a case, a power supply or a monitor, they may well be reusable. Test them before deciding: a case is fine if it accepts the new board’s form factor and the new card’s length, and a power supply is fine if it is reputable, modular and rated above what the new CPU and GPU need. Anything unknown or unbranded is not worth gambling a new graphics card on.
Prepare the case and install the power supply
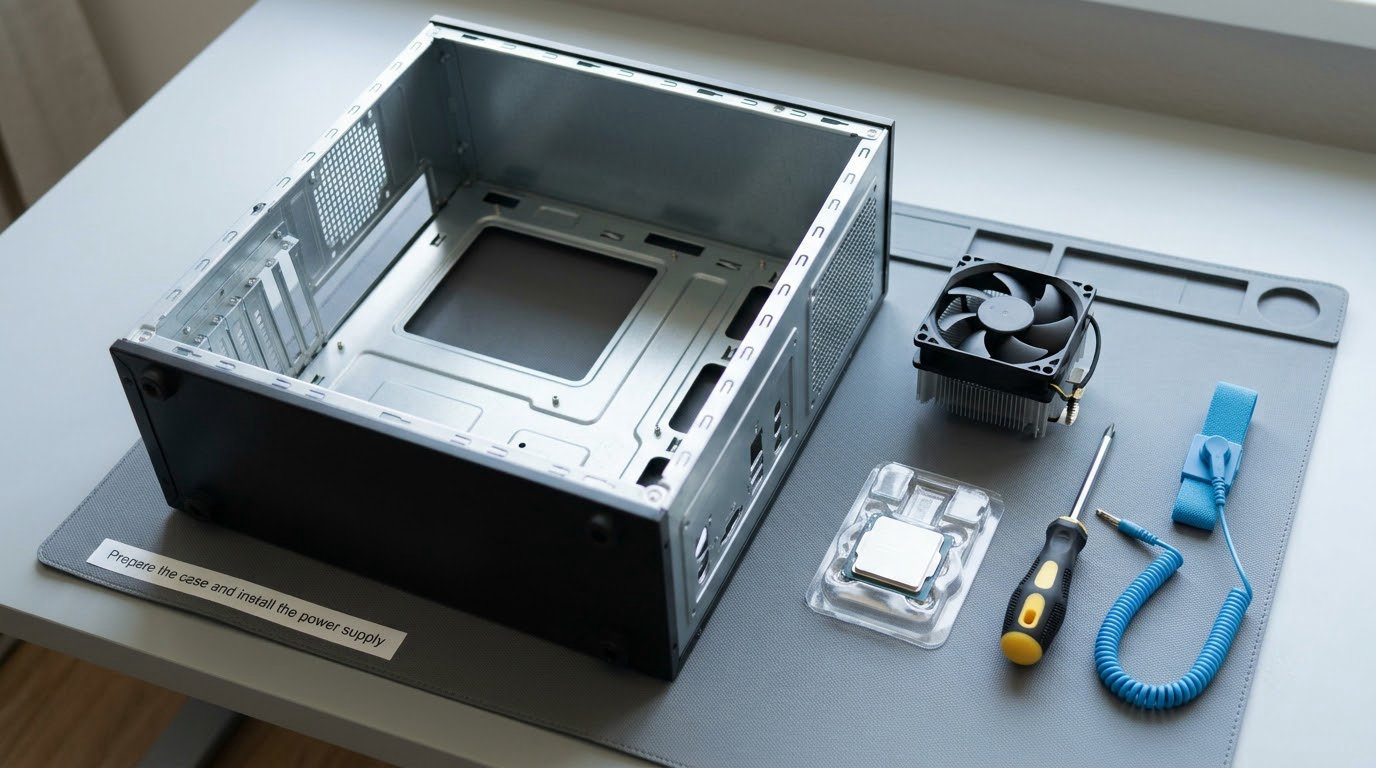
Put the case on its side on a mat, remove the side panel, and set the screws somewhere you will find them. Before anything else, fit the I/O shield — the flat metal plate with rectangular cutouts — from the inside of the case, pressing each corner until it snaps. Retrofitting it later with a motherboard in the way is genuinely miserable.
Next, screw in the standoffs. These short brass posts come in the case bag, and there must be one under every mounting hole the motherboard uses. Count the holes on the board, count the posts, and match them. A board resting directly on bare case metal shorts out, and you may not find out until the machine behaves strangely weeks later.
Install the power supply with the correct airflow. Most cases mount it with the fan facing down, drawing air from the bottom of the case; cases with a shroud at the bottom mount it fan-up, pulling air through the case from below the shroud. The manual or the case’s own label tells you which. Push it into the bracket and screw it down, then check the back of the PSU for a rocker switch and set it to the correct mains position.
Install the processor and thermal paste
Build the PC on its side, on top of its box if you have one. Working upright with the board at eye level is how CPUs get dropped.
Find the socket on the motherboard and lift the retention lever to its fully open position. AMD sockets have a plastic guard plate that lifts with the lever; Intel sockets do not. Line the small gold triangle on the CPU corner up with the matching triangle on the socket, lower the lever, and let the CPU drop into place under its own weight. Do not press or slide it. If it does not drop in freely, the orientation is wrong — pull it straight back out and check the triangle again rather than forcing it.
Handle the CPU by the edges with dry fingers. Touching the underside, or the pins on an Intel board, is how bent pins happen, and bent pins are not a beginner repair.
Apply thermal paste next, unless the cooler already has a blob of paste under a metal plate. If it does, peel off the protective film — people leave that film on and then wonder why the CPU hits 95 degrees instantly. If it does not, put a pea-sized dot in the centre of the heat spreader. A thin line across it also works. That is all the paste needed; flooding the chip is another common beginner move and does nothing good.
Mount the cooler’s backplate from underneath the board, set the tower on top, and tighten the mounting screws in a cross pattern, a couple of turns at a time, so the pressure stays even. Plug the cooler fan into the CPU_FAN header on the board, not into a spare system fan header.
Install the memory, M.2 storage, and motherboard
Handle RAM by the ends and align the notch in the module with the notch in the slot — it only goes one way. Press both ends down until the clips on each end snap closed on their own.
Slot choice matters more than most guides admit. For two modules, use the second and fourth slots from the CPU, usually labelled A2 and B2, which is what gives you dual-channel memory. The first slot alone runs single-channel and quietly costs you a noticeable slice of frame rate. Check the board’s manual if the labelling is unclear, because the numbering starts next to the CPU on some boards and at the far edge on others.
Do not mix kits. A stick from one kit and a stick from another usually runs in a slower mixed mode, or refuses to run at the profile you expected. If you already own memory, replace it rather than adding to it.
Install the M.2 NVMe SSD now, while the board is still outside the case. Insert it at about 30 degrees, press it flat, screw it down with the tiny M.2 screw, and refit the motherboard’s M.2 heatsink over the top if one came with it.
Lower the motherboard onto the standoffs so the ports line up with the I/O shield openings. Push the board straight down onto the posts, then screw it in at each mounting point. Start with the middle screw so the board sits square, then work outward.
The fiddly bit comes next: the thin case wires hanging from the front panel. Every motherboard has a row of tiny pins labelled along the board edge, and the case wires are labelled to match. Find power switch, reset switch, power LED and HDD activity LED on that row and press each one onto the correct pins — polarity matters on the LEDs. Positive goes to the positive pin. The USB and HD audio cables go to their own headers nearby. This is where a wrong connection shows up as a PC that appears dead, so it deserves patience.
Install the graphics card and case fans
Find the PCIe x16 slot, usually the long slot nearest the top of the board, pull back its retention clip, and line the card up so the notch in its bracket matches the raised part of the slot. Press down until it is fully seated, then push the clip back up or screw the bracket in. If you feel resistance, stop and check the notch rather than forcing it.
Most modern gaming cards draw power through one or more 8-pin PCIe connectors on the top edge, and running a heavy card with no power at all is a reliable way to get a machine that powers on and shows nothing. Route those cables from the power supply directly. Never run a graphics card through a riser cable or a daisy-chained adapter for a first build — extra connectors and tight bends behind a card are a common source of trouble.
Fans next, and orientation is the part people get backwards. Look at each fan frame: most have an arrow or a sticker showing which way the air moves. As a rule, mount two or three intake fans at the front or bottom where they pull cool air in, and one or two exhaust fans at the rear and top pushing warm air out. Balanced with slightly more intake than exhaust keeps dust outside and pushes air across the components. Cases usually include the standoffs and screws needed for both positions.
Connect power, cables, and display output
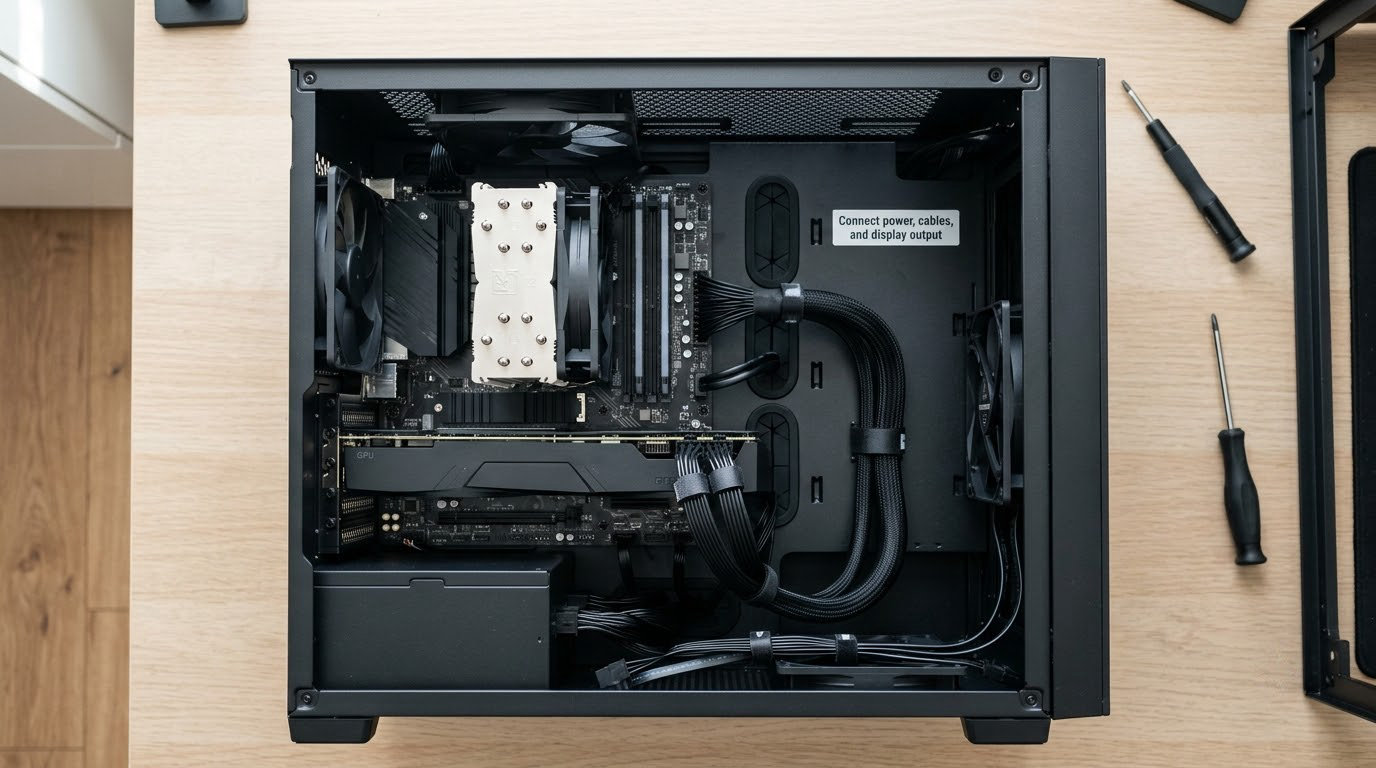
Two connectors matter most. The 24-pin ATX plugs into the right-hand edge of the motherboard and powers the board itself; it is the largest connector and only fits one way. The 8-pin EPS12V near the CPU powers the processor and looks similar, which is why people force the wrong one in — check the label on the connector, not the shape. Route the EPS cable through the top-left cutout of the case if there is one, so it does not sit under the graphics card.
Then connect the graphics card’s power cables, any SATA power for hard drives, the case fans to their headers or a fan hub, and the front-panel USB and HD audio headers. Bundle the excess with straps and push it behind the motherboard tray. Tidying is not decoration: cables pressed against a spinning graphics card or blocking an intake fan turn into heat and noise problems later.
Plug the monitor into the graphics card, not the motherboard’s video outputs. The board’s outputs only carry a picture when there is no dedicated card installed, so a first build that powers on and shows nothing is very often just a display cable in the wrong port.
One safety rule overrides everything else in this section: never reuse modular power supply cables from a different power supply, even when the connector looks identical. Pinouts differ between models, and the wrong cable can destroy a motherboard or graphics card instantly. This is the mistake the r/buildapc community treats as the most dangerous error a beginner can make, and it is repeated often enough to be worth memorising. Only the cables that shipped with your specific PSU go in it.
Turn it on, install Windows, and test the PC
Leave the side panel off for the first power-on. Connect the monitor, the keyboard, and the power cable, then press the case’s power button.
What should happen: fans spin, the motherboard’s diagnostic LEDs or debug lights flash briefly, and the screen shows the manufacturer’s logo followed by the Windows or installer screen. That sequence is called POST — power on self test — and reaching it means the CPU, memory, motherboard and power supply are all alive.
If it does not go that way, work through the symptoms in this order.
| Symptom | Likely cause | What to do |
|---|---|---|
| Nothing at all, no fans | Power not reaching the case, or rocker switch off | Check the wall socket, the PSU rocker switch, and that the 24-pin connector is fully seated |
| Fans spin, no display | Monitor cable in the wrong port, or graphics card not powered | Move the cable to the graphics card; connect the card’s PCIe power cables |
| No display, fans spin, one debug LED lit | CPU, memory, GPU or storage, in that diagnostic order | Reseat the memory in A2 and B2, confirm the CPU cooler is mounted and its fan header connected |
| Beeps, then stops | Memory not seated, or front-panel wires on the wrong pins | Reseat RAM, unplug everything except CPU and one stick, and recheck the front-panel header |
| Logo appears, then “no boot device” | No drive present or wrong boot order | Confirm the M.2 drive is seated under its heatsink and that the boot order lists it first |
| Runs briefly, then shuts off | Overheating or an unstable power connection | Check the CPU fan spins, verify the cooler is mounted, and reseat every power connector |
The single most useful isolation test: remove everything except the CPU, one stick of memory in the correct slot, and the power supply, then boot. If it POSTs, add components back one at a time until the fault returns. That takes ten minutes and replaces an hour of guessing.
With a working POST, install Windows. Create a bootable USB drive on another computer using Microsoft’s official media creation tool, plug it into the PC, and start it from Settings, System, Recovery, Advanced startup. The installer walks through partitions and activation. Windows will want a product key; a license is a license whether the machine was assembled by you or by a shop, so nothing about building changes that obligation.
After Windows is up, do four things in order. Install the motherboard and graphics card drivers from their manufacturers, using the clean-install option where offered. Enter the BIOS and enable the memory profile, called EXPO on AMD boards and XMP on Intel ones — without it your fast memory runs slowly and you will assume the build is underpowered. Set the monitor refresh rate to its highest option in Windows display settings, because a high-refresh monitor defaults to 60Hz out of the box. Then run a stability test for an hour or two, because a system that crashes in week one is worth returning while you still can.
Common Mistakes
Almost every first build that goes wrong goes wrong in one of a handful of repeatable ways. Each of these has a symptom you can recognise.
1. Forgetting the standoffs. Symptom: random crashes, boot failures, or a board that misbehaves only when touched. Fix: remove the motherboard and fit one standoff under every mounting hole.
2. Forcing the CPU into the socket. Symptom: bent or broken pins, or a socket that will not latch. Fix: lift straight up, find the alignment triangle, lower it under its own weight, and close the lever.
3. Reusing modular PSU cables. Symptom: instant death of a component, or nothing at all. Fix: use only the cables supplied with that power supply. There is no workaround and no adapter that makes this safe.
4. Leaving the protective film on a pre-pasted cooler. Symptom: high temperatures within seconds of load. Fix: peel it off before mounting.
5. Plugging the monitor into the motherboard. Symptom: no display with a graphics card installed. Fix: use the graphics card’s own output.
6. RAM in the wrong slots. Symptom: frame rates lower than expected despite fast memory. Fix: use A2 and B2, then enable the memory profile in BIOS.
7. No GPU power, or a daisy-chained cable. Symptom: fans spin, no display, one diagnostic LED lit. Fix: connect each power connector directly to the supply.
8. Too little or too much thermal paste. Symptom: temperatures that climb immediately, or slightly worse cooling than expected. Fix: a pea-sized dot in the centre.
9. A weak power supply. Symptom: shutdowns under load in demanding games, or a system that will not boot with a strong card. Fix: buy headroom and prioritise the 80 Plus rating over raw wattage.
10. Never enabling XMP or EXPO. Symptom: memory rated at high speed running at a fraction of it. Fix: one setting in BIOS, saved before you exit.
A few habits carry you past the first build. Route cables behind the tray and strap the slack so airflow stays clear, and check the finished routing with the side panel on before you call it done. Plan upgrades around the graphics card first, then memory and storage; skip parts you will never use. Keep the receipts and the boxes, and check each manufacturer’s warranty terms, since a part bought from a retailer rather than a component maker is often covered by the retailer instead. Finally, dust is the enemy of a quiet PC — unplug it and blow out the intakes and filters every six months, and the fans will keep sounding new.
Frequently Asked Questions
How long does a first gaming PC build take?
Most first-time builders finish assembly in three to five hours, with another hour for installing Windows and drivers. Parts research takes longer than assembly, often one to three hours on top. Allow an evening rather than a lunch break, and expect a first build to move slower than any guide suggests.
My new PC build will not post, what should I check first?
Check power first: the wall socket, the rocker switch on the power supply, and that the 24-pin and CPU power cables are fully seated. Then confirm the monitor cable runs to the graphics card, not the motherboard. Next verify the CPU cooler is mounted with its fan header connected, and that memory sits in slots A2 and B2. Test with one stick in A2.
Should I build a gaming PC or buy a prebuilt?
Build your own if you want value, upgrade paths, and a machine you understand well enough to repair. Buy a prebuilt if you want it working today with a warranty handled by one company, and you are not comparing prices closely. Compare parts rather than headlines: check the exact CPU, graphics card, memory speed, and storage type, because prebuilt listings often hide weaker components.
Do I need liquid cooling for a first gaming PC build?
No. A tower air cooler handles any current gaming processor without throttling, costs a fraction of a liquid cooler, and has no pump to fail. Liquid cooling is worth it if you want a quiet machine or plan to overclock. Check your case supports the radiator size, and remember the case’s maximum CPU cooler height if you stay with air.
How do I know which RAM slots to use?
Use the second and fourth slots away from the CPU, usually labelled A2 and B2. Those two give dual-channel memory; a single stick in the first slot runs single-channel and loses noticeable frame rate in games. The board manual shows the layout, since numbering starts at the CPU on some models. Buy one matched kit rather than mixing two sets.
What should I do first after finishing a new gaming PC?
Install the graphics card and chipset drivers, enable the memory profile in BIOS (EXPO on AMD, XMP on Intel), and set your monitor to its highest refresh rate in Windows display settings. Then confirm Windows sees the full amount of memory you installed. Finally, run a heavy game or a stability test for a couple of hours before you start trusting the machine.
Conclusion
The build order is short enough to remember: prepare the case and install the power supply, fit the CPU and cooler, add memory and the M.2 drive, mount the motherboard and connect the front-panel wires, add the graphics card and fans, then connect power and hook the monitor into the card. Boot it before anything else goes in, install Windows from a USB drive, and turn on the memory profile.
Start with the budget, not the shopping cart. Pick the resolution and refresh rate you actually want, spend most of the money on the graphics card, check compatibility with a free parts checker, and gather your tools on a hard floor before the first box opens. That preparation is the difference between an afternoon of fun and an afternoon of returns.