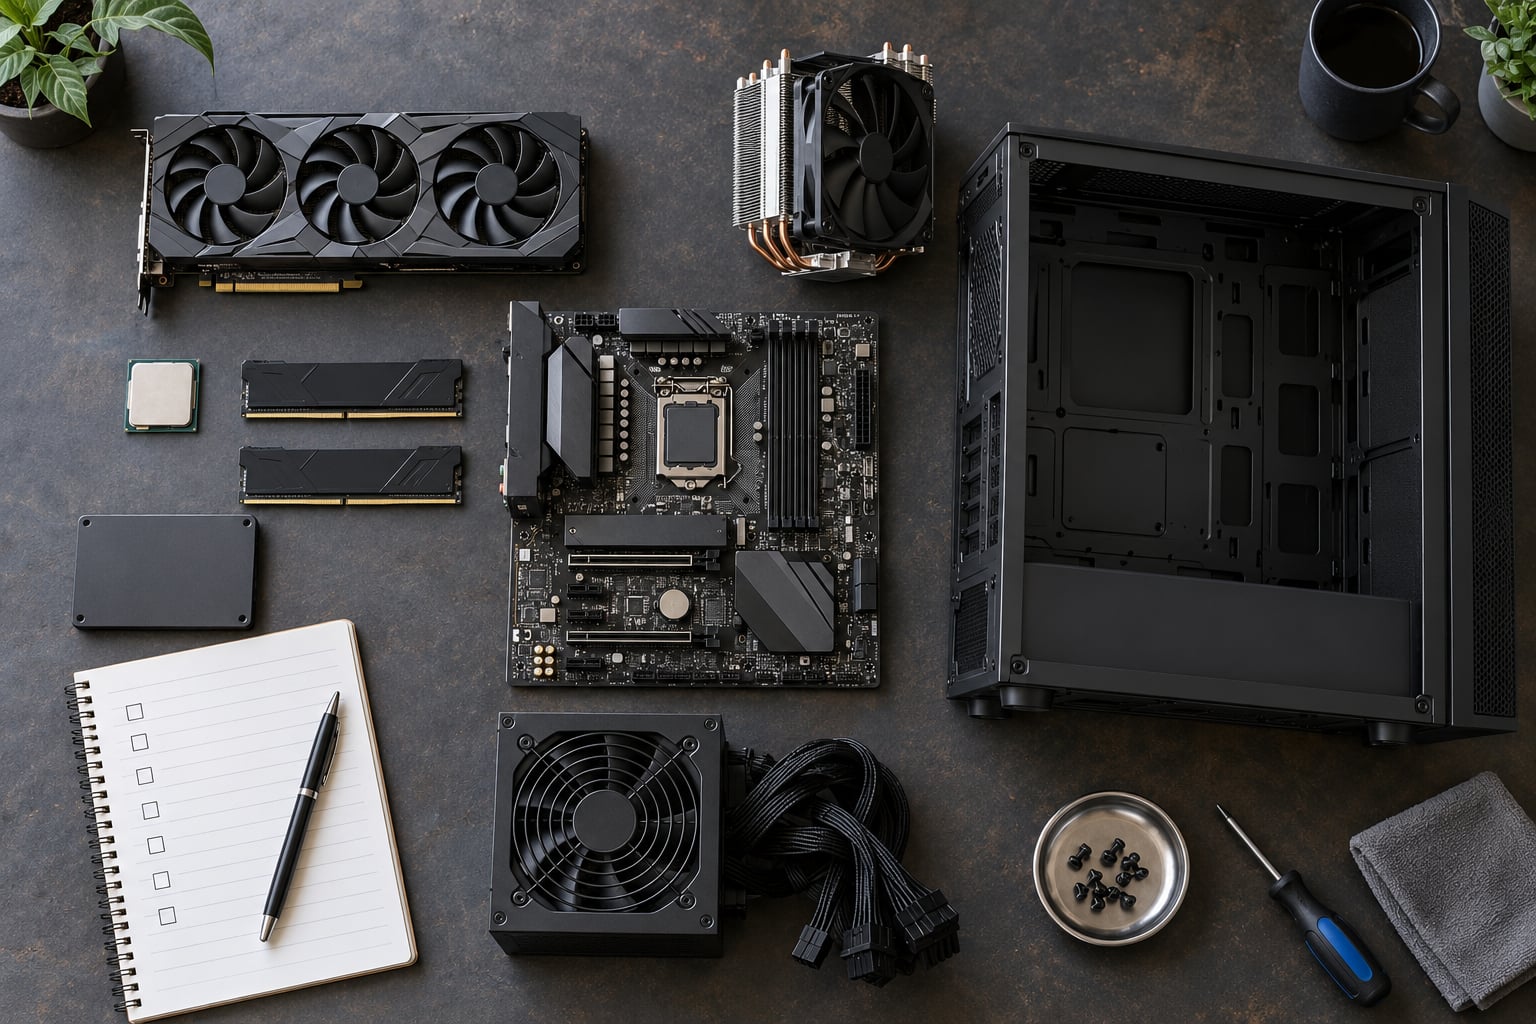
How to choose parts for a budget gaming PC: you need eight components — CPU, GPU, motherboard, RAM, storage, power supply, CPU cooler and case — and the one that decides your frame rate is the graphics card. Set your target resolution first, pick the GPU that hits it, then match a CPU that can feed it and fill in the rest around that pair. Last updated October 2026.
That is the whole method. The rest of this guide is the detail: where to spend, where to save, and how to check the parts actually fit together before you click buy.
If you are starting from nothing, the honest truth is that the number of choices is the hard part, not the money. A single budget gaming PC build means matching sockets, memory generations, wattage and clearances across parts made by a dozen companies. Post your list in a forum like r/buildapc or r/suggestapc and the reply you get back is almost always about balance, not specifications.
So here is the framework I use when I help someone plan a build: decide the target, fix the two components that move frame rates, then let the other six follow. Nothing gets bought until it fits that sequence.
Table of Contents
- 1What You Need
- 2Step-by-Step: How to Choose Parts for a Budget Gaming PC
- 31. Set the Budget and Target Resolution
- 42. Choose the Graphics Card First
- 53. Match the CPU to the Games and GPU
- 64. Select a Compatible Motherboard
- 75. Choose the Right Amount of Memory
- 86. Pick Storage for Games and Updates
- 97. Select Adequate Power and Cooling
- 108. Check Compatibility Before Buying
- 11Common Mistakes
- 12Frequently Asked Questions
- 13Is 32GB RAM overkill for a gaming PC?
- 14How do you know if your PC parts are compatible?
- 15How long will a gaming PC build last?
- 16Is building a gaming PC cheaper than buying a prebuilt?
- 17Do I need to buy a CPU cooler with my processor?
- 18What is the most important component in a gaming PC?
- 19Conclusion
What You Need
Before you open a single product page, you need seven pieces of information. Without them, any parts list you write is guesswork with a total attached.
- Your total budget, and whether it covers only the tower or the monitor and other peripherals too. Budget builds break when the monitor was never in the number.
- Monitor resolution and refresh rate — 1080p, 1440p or 4K, and 60Hz, 144Hz, 165Hz or 240Hz. Your monitor is the ceiling your GPU is aiming at.
- The resolution you actually want to play at. This is a separate decision from the one you have today.
- Your games. Competitive shooters, city builders and 4K cinematic releases have very different demands.
- Your operating system decision, since a Windows licence is a real line item you may otherwise forget.
- Case size constraint, if your desk space is small or you already own a case.
- Anything you can reuse — a case, a cooler, an old solid-state drive, a licence you already own.
That last point decides whether this is a complete build or an upgrade, and the two are planned very differently. A complete build allocates money across all eight categories. An upgrade to an aging prebuilt often needs only a graphics card, a power supply and maybe more memory, which is why many people are surprised to find their GPU money went further than expected.
Write the budget down as a single number and treat it as fixed. If it helps, keep a small reserve — roughly five percent — aside for the operating system or for the day a part you picked jumps in price. I have seen that reserve save a build more than once.
Step-by-Step: How to Choose Parts for a Budget Gaming PC
1. Set the Budget and Target Resolution
Divide the money first, then choose parts inside each share. That is the single change that makes the rest of the process simple, because no decision can quietly drain the GPU budget.
| Component | Share of total build spend | Where budget builds go wrong |
|---|---|---|
| Graphics card | 35–40% | Spending here is right; overspending past the target resolution is not |
| Processor | 20–25% | Buying flagship cores that games never use |
| Motherboard | 8–10% | Paying for premium features with no second GPU or extra M.2 slot |
| Memory | 6–8% | Cheap single-channel kits, or four modules that will not run at rated speed |
| Storage | 5–7% | Under-provisioning capacity, then running out of room for one more game |
| Power supply | 7–8% | Treating the cheapest unit as the sensible one |
| Case | 6–8% | Paying a premium for a glass panel instead of airflow |
| CPU cooler | 4–6% | Skipping it and relying on whatever is bundled, if anything |
Your resolution target then changes these priorities. At 1080p you are often limited by CPU and frame pacing before the GPU runs out, so a mid-range processor and a stronger card is a sensible pairing. At 1440p the GPU does more of the work and the CPU requirement eases a little. At 4K the graphics card dominates almost completely, which means you should put more of your money there and save harder on everything else — but that only works if you are also running a 4K monitor.
How do you know it worked? Write your allocation down before shopping and check against it after each addition. If the processor is about to pass a quarter of the total, you have found your answer before the checkout.
2. Choose the Graphics Card First
The GPU is the largest single spend and the component that decides your frame rate, so it goes first. Everything after it is chosen to match.
Four things matter when you compare cards: the tier of performance, the VRAM capacity, the board power draw, and the power connectors required. Modern games stream assets constantly, so a card with too little VRAM produces stutter that looks exactly like a bad frame rate but will not improve at higher settings. At 1080p a 6GB card is workable. At 1440p, aim for 8GB or more. At 4K, 12GB or 16GB is the sensible floor.
| Build tier | Target resolution | Typical refresh rate | Where to put the money |
|---|---|---|---|
| Entry | 1080p | 60–144Hz | Graphics card and CPU roughly even; 16GB memory; one storage drive |
| Mid-range | 1440p | 144–165Hz | Graphics card first, mid-range processor, 32GB memory, NVMe plus a second drive |
| High performance | 1440p high settings or 4K | 144–240Hz | Graphics card dominant; quality power supply and airflow case |
| Enthusiast | 4K high settings | 120–240Hz | Graphics card and CPU both high tier; little left for decoration |
Two warnings here. First, do not buy a card that needs 300W with a power supply or a case you have not sized for it. Second, resist the pull of the strongest card money can reach. A tier that overshoots your resolution buys frame rates a 1440p monitor cannot display, which is how people end up with a disappointing build and no idea why.
How do you know the GPU choice worked? Check that its length fits your case’s clearance figure, that your planned power supply has the right wattage and connectors, and that its VRAM is enough for the settings you intend to run. If all three hold, lock it in and move on.
3. Match the CPU to the Games and GPU
Pick a processor that is roughly the same tier as the GPU you just chose, and that suits the games you play. That is the whole rule, and it is more useful than it sounds.
Most modern games lean on a small number of fast cores rather than a large total. A processor with many cores and modest per-core speed will lose frame rate against a smaller chip that boosts higher. That is why a six- or eight-core part is usually the sensible budget pick and why flagship many-core processors are money spent on headroom you will not use — unless you also edit video, compile code or run a heavy streaming setup alongside gaming, in which case those extra cores earn their place and a bigger budget overall.
Bottleneck means the weaker half of the CPU/GPU pair limits the whole system. When the graphics card is faster than the processor can feed, extra frames sit unused. Symptom: frame rates that trail well below what the card should deliver, particularly at 1080p where the load is easiest to spot.
The fix is not automatic — you cannot assume a mismatch, and frame caps in the game will confuse the picture — but treat tier gaps as a reason to check rather than ignore. If you suspect it, compare frame rate at your target resolution against a lower setting. If the difference is small, the CPU is your limit. If the gap is large, the card is still working hard.
How do you know it worked? The processor should be from the same generational tier or one step below the GPU, and the total of those two parts should land close to the 55–65% share you set in step 1.
4. Select a Compatible Motherboard
The motherboard is a connector hub, not a performance part. Its job is to carry the CPU, the memory and the graphics card without limiting them, and to give you room to grow.
Check five things: the socket must physically match your CPU, the chipset must support it, the memory type must match your RAM generation, the form factor must fit your case, and the expansion options must cover what you might add later. Socket names such as AM5 and LGA1700 are not interchangeable, and a board designed for one memory generation will not accept the other.
On budget builds the temptation is a premium board for its looks. Resist it. Wi-Fi and Bluetooth you will never use, five M.2 slots for drives you will not add, and a metal heatsink covering an unused chipset do not raise your frame rate. What does matter is a decent VRM with real heatsinks, because an underpowered board delivers unstable voltage to the CPU and that shows up as random crashes under load.
Also match the form factor sensibly. mATX boards are a good fit for smaller builds and cost less; full ATX gives more slots and better airflow clearance; ITX is compact but limits expansion. How do you know it worked? If the board’s specification page lists your exact CPU support and your memory type, and its dimensions fit the case, you are done with this part.
5. Choose the Right Amount of Memory
For a budget gaming PC in 2026, 16GB is a usable floor and 32GB is the right target. Sixty-four gigabytes is for people running heavy creative work alongside games, not for playing them.
Three separate things get confused here. Capacity is how much total memory you have — 32GB of two modules. Speed is the transfer rating, written as something like DDR5-6000. CAS latency is the delay in clock cycles, where lower is tighter, so DDR5-6000 CL30 beats DDR5-6000 CL40 in practice.
Dual-channel means the memory controller talks to two modules at once instead of one, and it roughly doubles memory bandwidth. Buy a matched 2x16GB kit rather than assembling capacity from separate sticks. Two DIMMs also give the memory controller an easier job than four, which is why four-module kits frequently will not hold their rated speed — a well-known disappointment that shows up as benchmark numbers that look wrong.
The generation choice follows the platform, not the budget. A DDR5 platform and a DDR4 platform are not interchangeable, so whichever you land on, buy the memory the board was designed for. How do you know it worked? Two modules, same kit, speed and latency the board’s specification sheet lists as supported, and an EXPO or XMP profile so the kit runs at its rated numbers instead of a slower default.
6. Pick Storage for Games and Updates
Storage is the purchase buyers rush, and running out of it is the most common regret I hear. Current releases routinely demand a lot of space, and the system drive also carries updates, game saves and shader caches.
Three options, in order of speed: NVMe SSDs, SATA SSDs, and hard drives. For a new build, an NVMe drive is effectively the floor — Windows installs and boots noticeably faster, and load screens shorten. A SATA SSD is a fallback only when a board lacks a free M.2 slot. A hard drive is for bulk media you never touch while gaming, not for your operating system.
On a single-drive budget build, pick more capacity than you think you need; SSD prices scale more gently with capacity than people expect, and running a drive permanently near full slows it down. Where the budget stretches to two drives, put the operating system and your most-used game on the faster drive and keep a larger secondary drive for the library — you get the load-time benefit where it counts without paying for fast storage you never use.
How do you know it worked? Count the games you expect to install, multiply by the largest install size you have seen, add headroom, and check the total against your drive. If the drive is M.2 NVMe, confirm the board has an M.2 slot and that you have a mounting screw — the screw is not always included.
7. Select Adequate Power and Cooling
Size the power supply from your components’ peak draw, then add headroom. The arithmetic is simple and worth doing once, because an undersized unit causes random shutdowns that look like anything from a bad stick of memory to a failing drive.
A worked example, using typical figures rather than specific models. Take a modern mid-range GPU drawing around 200W at peak and a mid-range processor with a power limit near 105W. Add memory, storage, fans and board at about 50W. That gives roughly 355W under load. Add 25 to 30% headroom for transient spikes and you land near 450W of continuous supply. Round up to the next standard capacity — 550W — so the unit sits comfortably below its limit at normal load rather than at the edge.
Then pick the quality tier. A reputable unit with an 80 Plus rating is the mark to look for; Bronze, Gold and Platinum describe efficiency, and a more efficient unit wastes less power as heat. Avoid no-name units regardless of their stated wattage, because the label tells you little about the internals. Buy modular or fully modular cabling so you only run the cables you need, which also helps airflow.
Cooling is the step most guides skip, and it matters. Many processors ship without a cooler at all, so budget for one. A tower air cooler handles most mid-range chips at a low noise level, and an all-in-one liquid cooler only earns its place when a CPU runs hot enough to throttle or when a shorter cooler is needed for clearance. Thermal throttling is the silent one: a processor that hits its temperature limit reduces its own clock, and your frame rate drops with no visible cause anywhere in the game.
For the case, airflow beats decoration. Front intake and rear exhaust with at least a couple of fans is enough for most builds. Check two clearance numbers before buying: maximum GPU length and maximum CPU cooler height. How do you know it worked? The PSU wattage exceeds your computed peak by roughly a quarter, the connectors match the GPU, and the case’s published clearance numbers cover both large components.
8. Check Compatibility Before Buying
This is the step that separates a build that posts on the first try from one that sits in pieces on your desk. Run it in this order, and treat the result as the go or no-go gate.
- Socket — the CPU’s socket matches the motherboard exactly. Check it twice; this is the most common and most expensive mistake.
- Chipset — the board supports your processor, including any BIOS update needed on launch day.
- Memory generation — DDR4 or DDR5, matching the board. Mixing is impossible, not just inadvisable.
- Form factor — ATX, mATX or ITX board inside a case that accepts that form factor.
- GPU length — the card’s length is within the case’s clearance, and the slot spacing works with the cooler you chose.
- Cooler height — the air or liquid cooler fits under the case’s side panel.
- PSU wattage and form factor — sufficient capacity by the calculation above, plus the right connectors for the GPU and the modular cables that ship with it.
- Operating system and licence — you have a valid licence if you are installing Windows.
- Included accessories — M.2 screws, Wi-Fi antenna if the board needs one, and any cables your storage or front panel requires.
Use the retailer specification page and the manufacturer’s manual rather than forum guesses. When a listing is unclear — particularly on maximum GPU length or which memory speeds the board supports — the manual settles it in a minute, and guessing costs a return.
Beginners also lean on PCPartPicker’s compatibility filter as the final gate before checkout. It catches most mismatches, but it reads the specifications the manufacturer published, so a vague listing still passes a check it should have failed. If a part’s page does not state a number you need, treat that as missing information and find it in the manual.
Common Mistakes
These are the errors that cost real money, roughly in order of how much they hurt. Each has a fix you can apply before checkout.
- Overspending on the processor. Flagship many-core chips barely move game frame rate. Fix: match the CPU tier to the GPU and put the difference into the graphics card.
- Buying an undersized or unbranded power supply. Symptoms are random restarts and shutdowns under load. Fix: run the wattage math and buy a reputable 80 Plus unit with headroom.
- Buying a case that is too small or badly ventilated. The GPU may not physically fit, or thermals may throttle later. Fix: check GPU length and cooler height clearance figures, and buy fans.
- Mixing memory modules or generations. Random stutter and slow boot are common. Fix: one matched dual-channel kit that the board supports.
- Buying the wrong socket. Nothing works, and neither part is returnable once opened. Fix: verify socket and chipset first, every time.
- Skipping storage capacity. A full drive slows down and refuses updates. Fix: count the installs first and buy with room to spare.
- Ignoring the cooler. A bundled cooler or none at all leads to thermal throttling. Fix: budget for a proper CPU cooler as its own line.
There are also parts you can safely skip on a budget build: elaborate RGB memory kits, glass side panels you look at rather than use, exotic water cooling, oversized cases, and premium audio or Wi-Fi modules you will never enable. None of it changes your frame rate.
Where you should spend more than comfortable: the power supply, the graphics card relative to your resolution target, and memory capacity. Where you can cut without consequence: case decoration, motherboard premium features, and cooler style. Buying a case and power supply that survive a future GPU upgrade is good budgeting, not overspending, because they are the two parts you will keep longest.
| Component | Typical lifespan before an upgrade is tempting | Verdict |
|---|---|---|
| Power supply | Longer than any other part | Buy once, with headroom |
| Case | Effectively forever if clearance is generous | Buy once, size it for a bigger GPU |
| Motherboard | Lasts as long as the platform is current | Buy once for the socket you choose |
| Storage | Fills up before it fails | Buy capacity you can grow into |
| Memory | Comfortably long | Buy once at 32GB |
| CPU | Refreshed every few generations | Budget for replacement, not longevity |
| GPU | Drives most upgrade decisions | Expect to replace this one first |
On shopping strategy, buying a complete bundle or a known-good prebuilt at the entry tier can beat assembling a list yourself, because you inherit a validated parts combination. Check warranty terms carefully either way, and confirm whether a prebuilt allows memory and storage upgrades before buying — some use soldered components that limit you permanently.
Used parts stretch a tight budget most safely where testing is easy and failure is visible: a graphics card, a storage drive, and a case. Be cautious with power supplies and motherboards, where a hidden failure can take other components with it. Every buildapc thread reaches the same conclusion about which parts not to cheap out on, and it is never the one you would guess.
Frequently Asked Questions
Is 32GB RAM overkill for a gaming PC?
No. 32GB is the practical target for a gaming PC in 2026, because modern titles plus a browser, voice chat and background applications will use most of 16GB. Buy one matched 2x16GB kit so the memory runs in dual-channel. Go beyond 32GB only if you edit video, run large virtual machines or stream while playing.
How do you know if your PC parts are compatible?
Check socket and chipset match first, then memory generation, then case form factor, GPU length and cooler height clearance, then power supply wattage and connectors. Run the list through a parts-picker compatibility filter as a second pass, but confirm any unclear figure in the manufacturer manual, because filters only verify what the listing actually states.
How long will a gaming PC build last?
A well-balanced build should stay comfortable for five to seven years at 1080p and high refresh rates, and closer to three to four at 4K, where hardware demands rise fastest. The power supply, case and motherboard usually outlast the CPU and GPU, so size those for the next upgrade rather than for today.
Is building a gaming PC cheaper than buying a prebuilt?
At budget tiers a prebuilt often costs less for comparable performance, because the parts are bought in volume and assembled fast. Custom building wins on component choice, upgrades and longevity. Check whether the prebuilt allows memory and storage upgrades before deciding, since soldered components can limit it permanently.
Do I need to buy a CPU cooler with my processor?
Usually yes. Some processors ship with a cooler in the box and some do not, so read the listing before assuming. A tower air cooler handles most budget and mid-range processors quietly, and it prevents thermal throttling, where a hot processor cuts its own clock and quietly reduces your frame rate.
What is the most important component in a gaming PC?
The graphics card, for frame rate at your chosen resolution. The processor matters more than people expect at 1080p and in simulation or strategy games, and memory capacity decides whether a large modern title stutters, but if you can only spend on one component, spend it on the GPU that meets your resolution target.
Conclusion
Start with three decisions: the total budget, the resolution and refresh rate you are targeting, and the games that set your requirements. From there, choose the graphics card, match a processor to it, then choose the motherboard, memory, storage, power supply, cooler and case that support that pairing.
Keep the split roughly honest — about 35–40% for the GPU and 20–25% for the CPU — and stop the process at the compatibility checklist before anything goes in a cart. On a fixed budget, a matched set of parts returns more gaming performance than any single impressive component, and the build you can actually finish and run is worth more than the one with the longest spec sheet.