Yes, you can play older PC games on modern Windows, and most of them need less work than you expect. The trick is working up a fixed order instead of guessing: get a clean copy of the game, install the legacy runtimes it needs, run it in Compatibility Mode, then reach for a DirectX wrapper, an emulator, or a virtual machine only when the cheaper step fails. Most titles from the DOS and Windows 95/98 era need the first two or three steps. A handful need everything.
This guide covers Windows 10 and Windows 11, including the changes in the 24H2 update. Times run from about ten minutes for a modern DirectX 9 game to an hour for a stubborn 1996 title that ends up in a virtual machine.
Table of Contents
- 1What You Need
- 2Step-by-Step: How to Play Older PC Games on Modern Windows
- 3Identify the game and its release requirements
- 4Install the game and its original dependencies
- 5How to play older PC games in compatibility mode
- 6Configure graphics, audio, controls and launch options
- 7Use a wrapper, patch or emulator when native settings are not enough
- 8Confirm the game works and document the successful setup
- 9Common Mistakes and Quick Fixes
- 10Frequently Asked Questions
- 11Can I play old PC games on a modern PC?
- 12Is there a way to play old PC games on Windows 11?
- 13How can I run old DOS games on Windows 11?
- 14Is it legal to use DOSBox, ScummVM or a virtual machine with my old games?
- 15Why did my old game stop working after a Windows 11 update?
- 16Do I need a DVD drive and a fast PC to play older games?
What You Need
Before you change a single Windows setting, gather four things: the game itself, free space for both the game and a backup copy, the two legacy runtime installers, and a way to read the original files if you own the discs.
Start with the game. GOG, Steam, EA App, and the original publisher’s own store are the safe places to get it. If you bought it on disc years ago, the disc is the legitimate source, and you can copy the files off it yourself. What to avoid is any download described as an abandonware repack, because that file is usually wrapped around something you did not ask for.
You also need those runtime installers, and this is the step most guides skip. The DirectX 9 EndUser Runtime from June 2010 is a standalone package of about 100 MB that restores the old DirectDraw and Direct3D 9 libraries Windows 10 and 11 no longer ship. Grab it from Microsoft, then install the Visual C++ redistributable that matches the game: 2005, 2008, 2010, 2012, 2013, 2015-2022 all still get downloaded by real software. A large share of “the game will not launch” threads trace back to one of these two installs.
Storage matters less than people think. A 1995 game is usually under 200 MB, and a virtual machine with Windows 98 needs about 2 GB of disk space. On RAM, 8 GB is a comfortable floor for everything below, and 4 GB still runs most DOS titles, though a virtual machine alongside a modern browser will feel tight. You do not need a discrete graphics card. Almost every game in this article renders in a window at 800×600 and never touches your modern GPU properly.
Finally, decide which tier the game belongs in before you start, because it saves a lot of trial and error.
| Game era | Try first | If that fails |
|---|---|---|
| MS-DOS, roughly 1991-1995 | DOSBox Staging or DOSBox Pure | Nothing else is worth trying; the OS itself is gone from Windows |
| Windows 3.1 and early Windows 95 | Compatibility Mode, then a Windows 98 virtual machine | PCem running a genuine Windows 3.1 environment |
| Windows 95 and 98, 1996-2000 | Compatibility Mode plus the DirectX 9 runtime | dgVoodoo wrapper, then a virtual machine |
| DirectX 7 and 8, 1999-2002 | Compatibility Mode, Windows 7 mode | dgVoodoo or d3dcompiler, then a virtual machine |
| DirectX 9, 2003-2008 | Straight install, then Compatibility Mode | Community patch for the specific engine, then a virtual machine |
| Point-and-click adventures, 1990-2000 | ScummVM with the original game data | Nothing; ScummVM handles the era well |
One more thing worth sorting now: an archive folder. Copy the whole game folder to a backup before you touch any settings, because compatibility changes rewrite configuration files in place and a bad tweak can leave a save you cannot load.
Step-by-Step: How to Play Older PC Games on Modern Windows
Identify the game and its release requirements
Before installing anything, write down four facts: the year, the operating system it shipped on, the graphics API it used, and whether it needs the disc while it runs.
The year tells you the API. Anything up to 1995 is DOS and belongs in DOSBox. 1995 to 2000 is almost always DirectDraw on Windows 95 or 98. 2000 to 2002 moves to DirectX 7 and 8. After 2003 you are looking at DirectX 9, and a lot of those titles still run with no changes at all.
CD-check matters more than people expect. A lot of mid-1990s games verify the disc on every launch and refuse to start from a folder. If yours does, keep the disc in the drive or mount the ISO each time. Copying files alone will not satisfy that check, and no amount of Compatibility Mode will change it.
Note the expansions too. A game that needs its second disc or an expansion installed first will throw a missing-file error that looks exactly like a Windows problem, when it is just an incomplete install.
Install the game and its original dependencies
Install from a reputable source, then install the runtimes in this order: DirectX 9 EndUser Runtime first, then the Visual C++ redistributable the game shipped with, then the game itself if you prefer it to own the folder. Restart is not required between them, but a reboot after the runtime install clears a stale file cache and saves an hour of confusion later.
If you have an ISO rather than discs, Windows 10 and 11 mount it on double-click. If the installer is a single compressed executable, extract it rather than running it, because some 2000s-era repacks from CD launchers behave badly when run directly. Windows Explorer can open most of them.
On disc hardware: modern laptops have no internal optical drive, and a USB external DVD drive usually works but sometimes fails to read older discs at higher speeds. Slow the drive down in the device manager, and if a disc still will not read, look for a drive on another machine or a service that reads the disc and hands you the files. That is your own disc, so making a copy is on the right side of the line.
If a launcher is refusing to start, skip it. The game executable is usually in the same folder, and running it directly bypasses the launcher entirely, which is how most early-2000s games behave better anyway.
How to play older PC games in compatibility mode
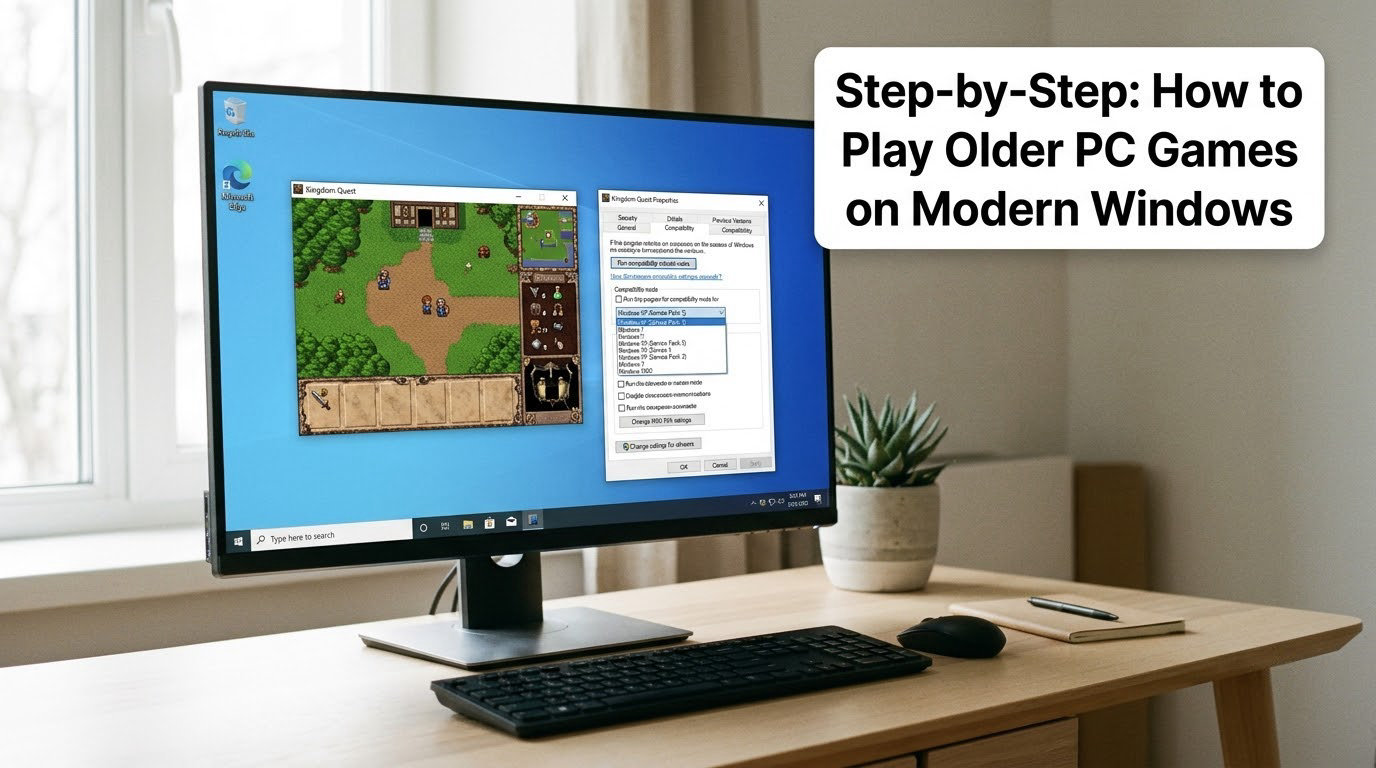
Compatibility Mode is a shim built into Windows that translates the system calls an old game makes and applies version-specific behaviour. It fixes a surprising share of titles in about two minutes. In Windows 11, right-click the game’s executable file, choose Properties, and open the Compatibility tab. Tick the box labelled Run this program in compatibility mode, pick Windows 7 from the dropdown, and press Apply. Then do it again with Windows XP selected, testing each version, because XP mode fixes some 1990s titles that Windows 7 mode breaks and the reverse holds for others.
The same path works in Windows 10, with the Compatibility tab in the same place under Properties. Neither version hides the setting, though Windows 11 sometimes calls it Compatibility and lists versions from Vista upward when the file was flagged as incompatible.
Two checkboxes in that same tab matter more than the version dropdown for most games. Tick Disable fullscreen optimizations when the game shows a black screen, a flickering window, or a stuttering slideshow on a high refresh display, because modern Windows treats old exclusive fullscreen modes badly. Add Run this program as an administrator when the game is stuck in a folder it cannot write to, which is the usual reason saves fail silently.
Reduced color mode, at 640 by 480, is worth trying for mid-1990s games that render wrong colours or show corrupted menus. The shim forces an 8-bit palette, and it fixes a lot of DirectDraw titles.
If you would rather not hunt through Properties each time, Windows has a built-in troubleshooter: Settings, Apps, Advanced app settings, App execution aliases, then Program compatibility troubleshooter. Run it against the executable and Windows tests the available modes for you. The interface path on Windows 10 is Apps, Apps and features, Program compatibility troubleshooter.
Configure graphics, audio, controls and launch options
Old games assume a desktop resolution of 640 by 480 or 800 by 600. Forcing a modern fullscreen mode at 2560 by 1440 is a common cause of black screens, so set the resolution on the desktop first, launch the game, and switch it to windowed mode with F1, Alt plus Enter, or the graphics menu.
On controllers, start with what the game already does. Many titles from 2000 onward accept an Xbox-style controller with no setup. For the ones that do not, Steam Input can map a controller onto the keyboard and mouse a game expects, and reWASD does the same outside Steam. Both are free, and both save per-game profiles, which beats a generic remapper when a game needs two different keys on the same face button.
For audio, most problems are a default device problem rather than a legacy one. Set the game to use the default Windows output, and turn off any audio enhancement on the playback device, because the old DirectSound path does not mix cleanly with surround processing. Games that genuinely use Miles or a specific driver often bundle a configuration tool in their folder; the speaker test in that tool is the fastest way to confirm it is talking to the right device.
If the screen goes black but you can hear the game running, there is no era-appropriate graphics driver any more, so a software renderer is the fallback. Microsoft’s basic display driver renders through the CPU and will display something for many 2D titles. For older 3D work, Mesa3D with the llvmpipe option does the same job and handles more of the old API surface.
Use a wrapper, patch or emulator when native settings are not enough
Each of these has a specific failure condition it fixes, and none of them helps if your problem is something else. Try them in order.
dgVoodoo is the fix for games that need DirectDraw or early Direct3D and get a blank screen, corrupted textures, or an immediate crash on modern hardware. It is a wrapper library: you place the files in the game’s folder and the game calls the wrapper instead of the system’s graphics interface, which then translates for the modern one. Games built for the 3dfx Voodoo cards, and titles from 1996 to 2000 in general, are the usual candidates. Copying a handful of files into the folder is reversible, so it is a low-risk step.
Community patches are the fix for games with a known bug on modern systems rather than a missing API. Source engine and GoldSrc engine games from the early 2000s have decades of accumulated patches that fix crashes, restore missing sound, and add widescreen support. Search the title plus the engine name and check that the patch predates your Windows version, or install a version that was rebuilt later.
DOSBox Staging is the fix for MS-DOS titles, and it is not optional. 64-bit Windows removed 16-bit DOS support entirely, so no setting on your machine will run a 1993 DOS executable. Install DOSBox Staging, which is the maintained fork, or DOSBox Pure if you want a simpler modern front end. Then, in the DOSBox window, mount your game folder and start the game by name. The classic sequence looks like this:
mount c .
c:
cd GAMESMYGAME
MYGAME.EXE
Change the last two lines to whatever your folder and executable are called. That is the whole process for several thousand DOS titles, and it gives you save states, rewind, and a scaling filter that makes 320 by 200 output look deliberate on a 4K monitor.
ScummVM is the fix for point-and-click adventures. It reimplements the engines used by games from LucasArts, Sierra, and their contemporaries, so titles like the Monkey Island and Day of the Tentacle era run natively at any resolution. You point it at the original game files, add the game from its built-in list, and play in a window. It needs the real data files, which come from your own discs or from a store that still sells the adventure.
PCem is the fix for anything that insists on a genuine copy of Windows 3.1 or Windows 9x, such as software that talks to the network stack or depends on multiple installed programs. It imitates the hardware and runs an operating system image inside it, so the game gets the real environment it was written for. It is the last stop before a full virtual machine, and it is slower to set up.
For NetPlay, Internet multiplayer, and the bundled Windows card games, different tools apply again. ScummVM has no bearing on modern online play, and multi-player through DOSBox needs a separate IPX or UDP wrapper alongside the emulator. Windows 11 also removed Minesweeper, Solitaire, and Hearts from the system, and the original versions come back through a third-party installer rather than through the store replacements, which are ad-supported.
Confirm the game works and document the successful setup
A game that opens is not a game that works. Run a short pass through this checklist: the menus draw correctly, sound comes out of the right device, keyboard and mouse or controller both register, a save completes and reloads, and the framerate holds steady for ten minutes rather than the first thirty seconds.
That last check catches a real failure mode. A game that runs smoothly for two minutes and then stutters badly is usually a fullscreen optimization problem, and toggling the box in Compatibility Mode usually fixes it.
Then write down what worked, in a text file next to the game. Note the compatibility version, whether fullscreen optimizations are disabled, whether it runs as administrator, which runtime you installed, and whether a wrapper file is present. When a Windows update changes behaviour, you will be glad to have the exact list, because rolling back one setting is easy and guessing which one changed is not.
Saving that note also makes a second game from the same developer and engine a five-minute job rather than an evening.
Common Mistakes and Quick Fixes
These are the failures that come up again and again, and nearly all of them are one of six things. Work down the list rather than trying changes at random.
The game will not launch at all. Almost always a missing runtime. Install the DirectX 9 EndUser Runtime and every Visual C++ redistributable, then run the executable directly instead of the launcher. If it still fails, tick Run as administrator; old games often cannot write to the Program Files folder, and the error dialog either says nothing or blames a DLL that is not the problem.
A missing d3dcompiler_47.dll message. Copy that file from another machine running Windows 10 or 11, or from a trusted utility package, into the game’s folder. The original file shipped with the DirectX 9 EndUser Runtime, which is the cleaner fix. This single missing file accounts for a large share of Windows 11 launch failures on DirectX 9 titles.
Black screen after launch, with sound playing. Tick Disable fullscreen optimizations, then try compatibility mode at Windows 7 and again at XP. If the game is from the Voodoo era or uses early DirectDraw, drop dgVoodoo into the folder before anything else.
Crashes to the desktop shortly after the menu. Usually an audio or input driver conflict, so set output to the Windows default device and test with the controller unplugged. For Source and GoldSrc games, a community patch fixes a lot of these.
No sound, or sound cutting out. Set the game to default output, disable enhancements on the playback device, and raise the game’s own volume before you raise the system volume. Miles-based titles need their bundled configuration tool to pick the right device.
Stuttering, or GPU usage pinned near 100 percent with almost no CPU load. This appeared with the Windows 11 24H2 update and affects older DirectX 9 titles that ran fine on Windows 10. Disable fullscreen optimizations first, then set the game to windowed mode. If neither helps, Settings, System, About lets you check the build, and Windows Update, Update history lets you uninstall the most recent quality update to confirm it as the cause.
A tiny window, or a stretched picture. Change the desktop resolution to match the game’s native output before launching, and use the compatibility shim’s reduced color mode for mid-1990s DirectDraw titles. A 640 by 480 game on a 4K monitor will always look small; that is the scaling, not a fault.
The disc will not read. Slow the external drive down in Device Manager, and try a different drive. Copying the files yourself from your own disc is the reliable route once you have readable media.
Two habits prevent most of this. Keep game folders out of Program Files, where the permission rules cause silent save failures, and keep a copy of any save folder you care about. As for the registry tweaks and one-click “compatibility fixers” that circulate on video, skip them. They change system state, they rarely say what they touched, and a Windows restore point is the only reliable way back.
Frequently Asked Questions
Can I play old PC games on a modern PC?
Yes. Nearly every PC game from 1990 to 2008 runs on Windows 10 or 11 with the right combination of settings and free tools. Windows-era titles usually need the DirectX 9 runtime plus Compatibility Mode, DOS games need DOSBox Staging, point-and-click adventures need ScummVM, and the stubborn remainder wants a Windows 98 virtual machine. Very few older titles are genuinely unplayable on current hardware.
Is there a way to play old PC games on Windows 11?
Yes, and the path is the same as Windows 10. Right-click the executable, open Properties, go to the Compatibility tab, and select Windows 7 or XP. Tick Disable fullscreen optimizations for games that show a black screen or stutter, and run as administrator if saves fail. The one Windows 11-specific wrinkle is the 24H2 update, which introduced stuttering on some DirectX 9 titles that previously ran fine.
How can I run old DOS games on Windows 11?
Use DOSBox Staging, the maintained fork of DOSBox. 64-bit Windows removed 16-bit DOS support completely, so no compatibility setting will run a 1993 DOS executable. Install DOSBox Staging, then in its window type mount c . and press Enter, change to your game directory, and run the executable by name. DOSBox also adds save states, rewind, and clean scaling on modern displays.
Is it legal to use DOSBox, ScummVM or a virtual machine with my old games?
The software is free, open source, and legal to download from its own project. What matters is where the game data comes from. Copying files from discs you bought is fine in most countries, and ScummVM works with data files from a legitimate purchase. Downloading a commercial title from a random abandonware site is not the same thing, and those repacks are the main malware risk in this whole hobby.
Why did my old game stop working after a Windows 11 update?
Because 24H2 changed how Windows handles legacy fullscreen modes, which shows up as stuttering, crashes, or high graphics usage with almost no processor load on DirectX 9 titles. The first fix is to tick Disable fullscreen optimizations in the Compatibility tab and run the game windowed. If that does not help, check your build under Settings, System, About and uninstall the newest quality update to confirm the cause.
Do I need a DVD drive and a fast PC to play older games?
No on both counts. A disc drive is only useful for discs you own, and a USB drive or a machine that can read the disc and hand you the files works just as well. Hardware is not the constraint: a 1996 game needs a fraction of what a browser uses today, and 4 GB of memory still runs DOS titles, though 8 GB leaves room for a virtual machine alongside normal desktop use.
Start with the game you want most, not the easiest one. Install the DirectX 9 runtime and the matching Visual C++ package, launch it as-is, and only then open Properties and work down the ladder: Compatibility Mode, fullscreen optimization, a wrapper, an emulator, and a virtual machine last. Most of the time you will stop at step two. When you do have to keep climbing, write down the setting that worked, because the next Windows update will be the thing that undoes it.